Mac Screen Recording No Sound?
Mac screen recording no sound? First check whether microphone audio or system audio is missing, then review macOS permissions, QuickTime options, and ScreenSage Pro's recording workflow.
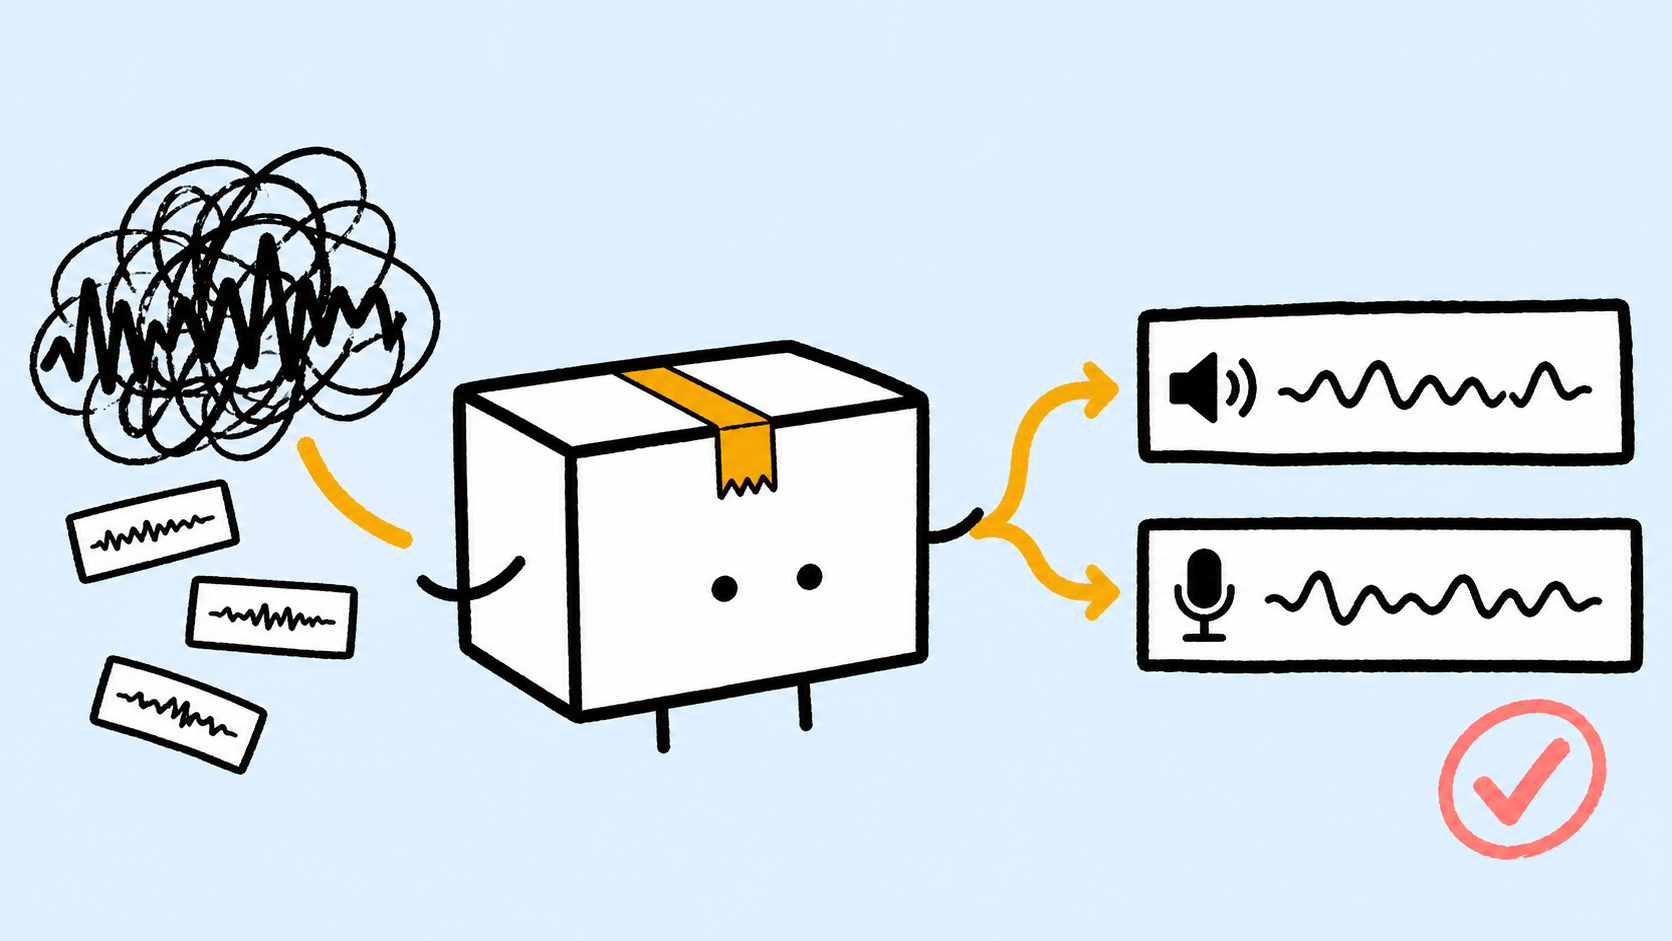
When a Mac screen recording has no sound, do not start by recording the whole thing again. First identify which audio source is missing: microphone audio, or system audio from the Mac.
Those are different problems. Missing microphone audio usually points to input device or permission settings. Missing system audio usually means the recorder did not capture internal computer sound. Separate the two cases first, and the fix becomes much clearer.
Fix Mac screen recording with no sound: check in this order
First, play back the recording and identify what is missing. If the screen is recorded but your voice is missing, check microphone input and microphone permission. If your voice is present but browser video, app sounds, meeting audio, or alerts are missing, check system audio recording. If both are missing, check macOS recording permissions first, then inspect the recorder input settings.
Do not rely on what you heard during recording. Hearing sound through speakers or headphones only means playback worked locally. It does not guarantee that the audio was captured into the video file.
1. Check macOS permissions
macOS restricts screen and system audio recording. Apple documents screen and system audio recording access as a privacy permission. Check screen recording, system audio recording, and microphone permission. After changing permissions, quit and reopen the recording app.
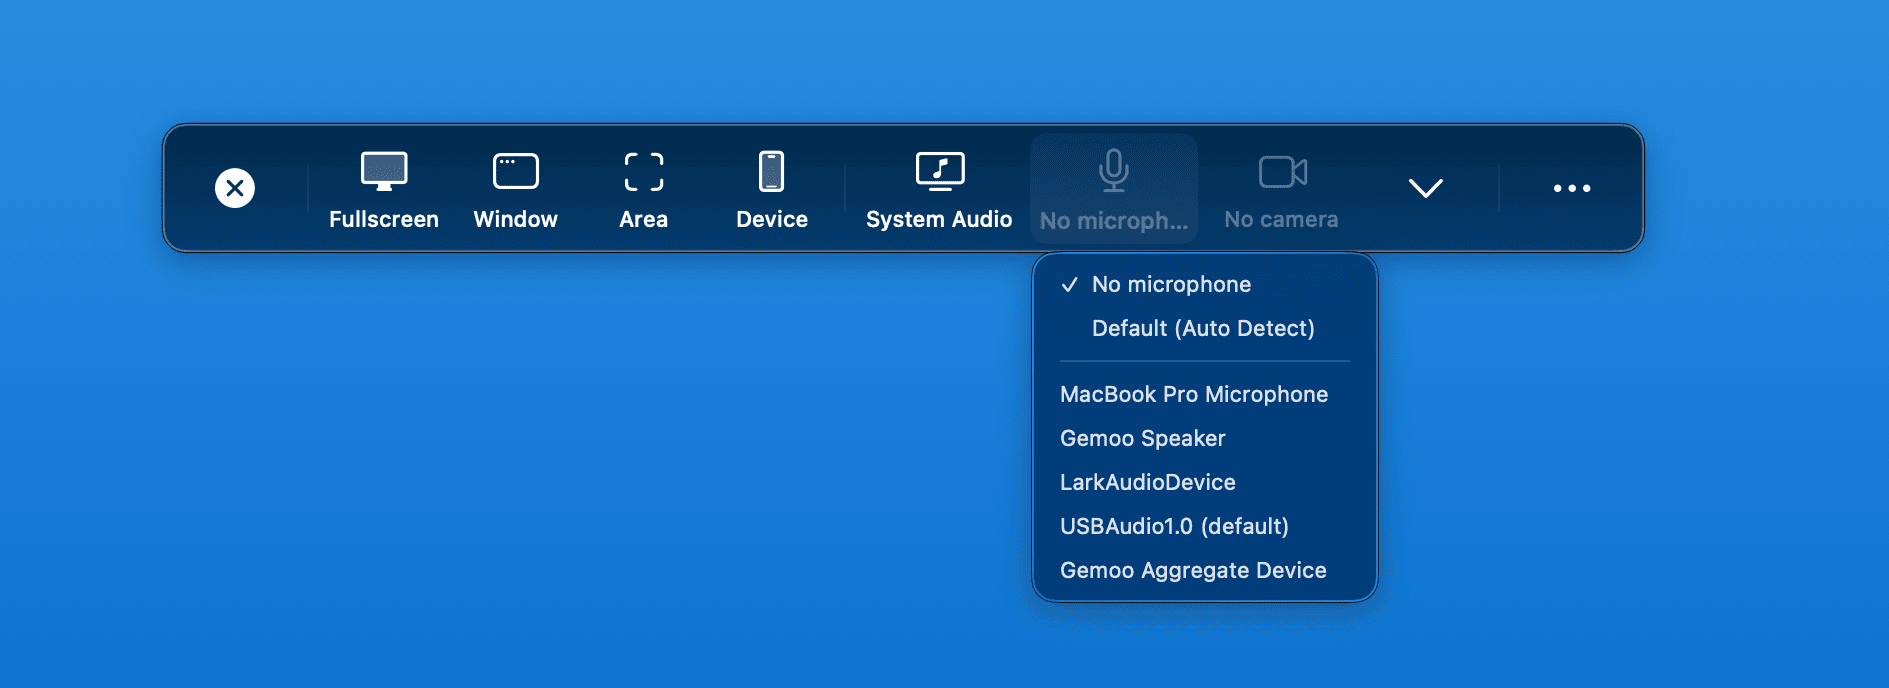
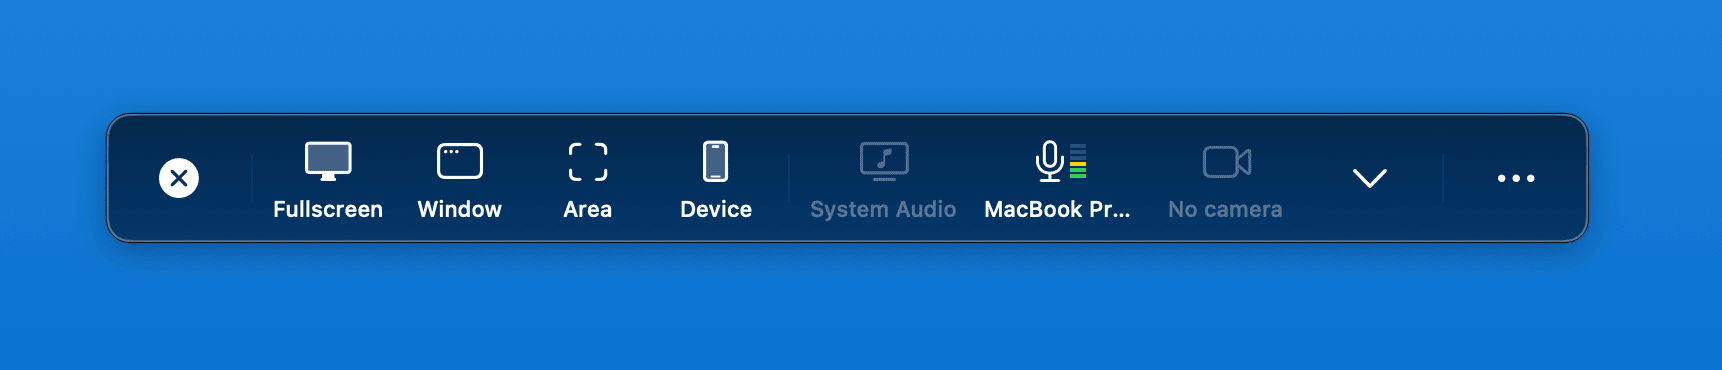
2. Check the selected microphone
If your voice is missing, do not assume the microphone is broken. Your Mac may switch between the built-in microphone, AirPods or headset microphone, an external USB microphone, or a display, dock, or audio-interface input. Before the real recording, check the microphone name and the level meter. If the level does not move while you speak, fix the input first.
3. Confirm whether the recorder can capture system audio
Many QuickTime screen recordings have no audio because users expect screen recording to automatically include internal Mac sound. Apple's QuickTime Player screen recording guide hands screen recording to the Screenshot tools; Apple's audio recording guide focuses on choosing microphone input. QuickTime is useful for lightweight capture and microphone recording, but it is not the same as a workflow for system audio, narration, and post-recording volume control.
4. Record a 10-second test clip
Before the real recording, make a test clip that includes both computer audio and your voice. Open the page or app you plan to record, play something that makes sound, say one sentence into the microphone, stop recording, and play back the test. Confirm that both computer audio and voice are present before recording the full walkthrough.
This simple check prevents the worst outcome: recording five, ten, or twenty minutes before discovering that audio was wrong from the start.
When should you record system audio?
System audio is not always necessary. Keep it when it helps the viewer understand the result.
Common cases include:
- Product demos with alerts, playback, or app feedback.
- Meetings, interviews, user tests, and support sessions.
- Browser, player, course, game, or design-tool audio.
- Software tutorials with narration.
If the sound does not add information, lower it or turn it off. A screen recording does not need every sound from the session. It needs the sounds that help the viewer follow the point.
When you record often, ScreenSage Pro makes the workflow safer
The checks above help you fix the immediate problem. If you only record occasionally, they may be enough. If you often make product demos, courses, launch videos, or support tutorials, the bigger problem is consistency: you want fewer audio mistakes before every serious take.
ScreenSage Pro keeps system audio, microphone input, and post-recording volume adjustment in one workflow. You do not need to jump between system tools, audio settings, and a separate editor just to confirm whether the final file has usable sound.
Use this order:
1. Confirm system audio first
Open the ScreenSage Pro recording panel and choose the screen, window, or region. Enable system audio, then play a short sound to confirm internal Mac audio is being captured.
2. Confirm the microphone next
Choose the microphone, and make sure it is not the wrong headset mic or built-in Mac mic. Check the level preview; if there is no movement, fix the input first.
3. Test before the full recording
Record a 10-second test clip and confirm both computer audio and voice are present. Then record the full walkthrough.
4. Mix the two sources after recording
In editing, adjust System and Microphone volume separately. Add fades around starts, endings, or cut points.

Why this matters for product demos
In a casual recording, a failed take may only mean recording again. In a product demo, a failed take often means rebuilding the whole scene: logging in, restoring test data, reopening windows, returning to the right page, repeating narration, exporting again, and checking the file again.
ScreenSage Pro helps because it exposes the risky parts before and after recording:
- You can confirm system audio before the real take.
- You can confirm the microphone and input level before the real take.
- You can adjust system sound and narration separately after recording.
- If app sound overpowers narration, you do not need to re-record a visually correct take just to fix the mix.
The point is not having another record button. It is reducing rework when the video needs to be published or shared.
FAQ
Can the built-in Mac screen recorder capture system audio?
It depends on the capture method and system setup. For serious product demos, the practical question is control: can you enable system sound, choose a microphone, and adjust both after recording? If not, use a dedicated recording and editing workflow.
What should I do when QuickTime screen recording has no audio?
Identify whether microphone narration or internal computer sound is missing. Then check macOS permission, Screenshot Options, microphone input, and whether the recording tool captures system audio. Do a 10-second test before the full recording.
Are internal audio, computer audio, and system audio the same thing?
In screen-recording contexts, yes. They usually mean sound produced by the Mac and captured into the recording. Common labels include system audio, internal audio, computer audio, and app audio.
How do I record system audio and microphone at the same time on Mac?
In ScreenSage Pro, enable system audio, choose the microphone, and record a 10-second test clip. Confirm both computer sound and voice are present. After recording, adjust System and Microphone volume separately.
Why not fix the audio after recording?
Some audio problems do not have a clean post-production fix. If system audio was never captured, it usually cannot be recovered from the video. If the wrong microphone was selected, replacing narration often sounds less natural. A pre-recording check is cheaper than a repair attempt.
Conclusion
When a Mac screen recording has no sound, solve the immediate problem first. Check whether microphone audio or system audio is missing, then review macOS permissions, the selected input device, QuickTime or Screenshot options, and whether your recorder supports system audio.
If you only need a one-time recording, the checklist above may be enough. If you often make narrated product demos, courses, or launch videos, start from the ScreenSage Pro download page and keep audio checks, recording, and volume adjustment in one workflow.
Auto zoom, cursor smoothing, text cursor follow, and fast export for Mac demos and tutorials.
Download ScreenSage Pro